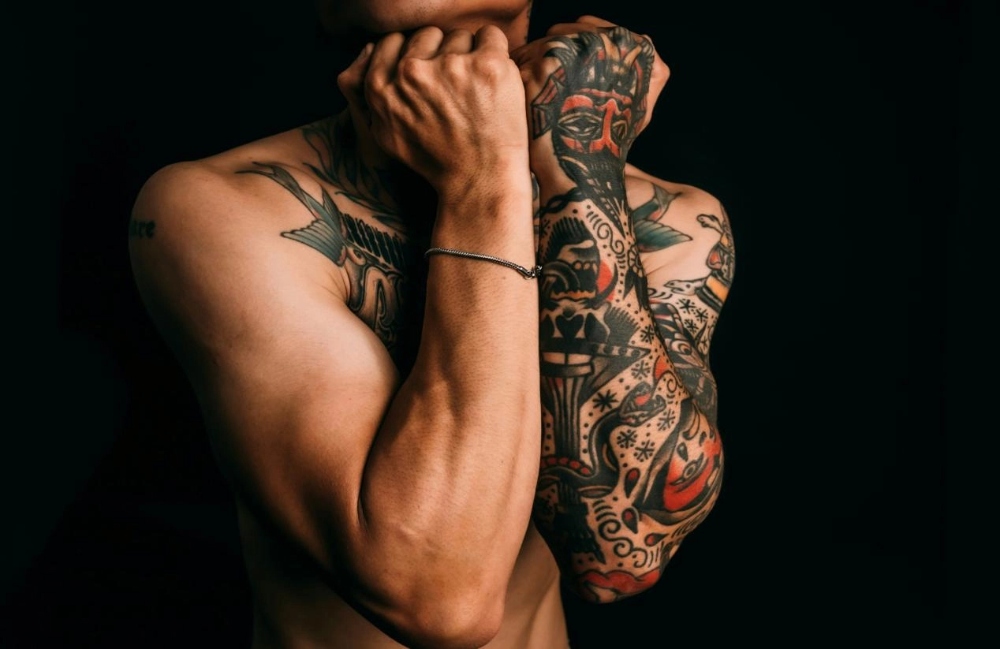
Walk into any coffee shop or grocery store today, and you will quickly notice how many people are walking around with full arms of heavy ink. The massive, continuous sleeve design is more popular right now than at any point in tattoo history. Clients no longer want small, disconnected stickers floating on their skin. They want big Japanese waves, complex tribal patterns, or hyper-realistic forests wrapping all the way from their shoulder down to their wrist.
But every working artist knows the dark, frustrating secret behind these massive pieces. Getting a full sleeve tattoo stencil perfectly aligned onto a rounded human arm is a total nightmare if you are stuck using basic office supplies. You print four separate pages, grab a pair of scissors, and try to tape them together perfectly. One millimeter of tape overlap, and the whole face of the portrait twists. Today, we are going to look at exactly how professionals skip the scissors entirely and print long tattoo stencil designs in one smooth motion, saving hours of frustration.
The Real Cost of Splicing Standard Paper
When you rely on standard 8.5 by 11-inch sheets for massive arm projects, you inevitably run into severe physical limitations. Cutting and taping multiple pages together creates thick, rigid seams that completely refuse to bend over the natural curves of the human body.
Wasting Hours Before the Session
Most professional tattooers charge between $100 and $200 per hour. If you spend 45 minutes sitting at your front desk playing with scissors and sticky tape, you are literally throwing money away. Trying to build a large tattoo stencil out of small squares is incredibly tedious. The pages from your standard thermal machine always have a tiny blank white margin around the edges. You have to trim that margin perfectly straight on every single page before you even start taping. Artists often hold the pages up to a bright window just to see through the paper and line up the purple ink marks. If you accidentally cut into the line, you have to throw that page away in the trash and print it all over again.
The Pain of Warped Lines
The real disaster happens when you try to apply that taped-up monster to your client. An arm is essentially a moving cylinder. Paper naturally hates wrapping around cylinders. When you add three or four strips of stiff scotch tape to the back of the paper, it becomes completely rigid at those specific joints. As you press it firmly against the client’s bicep or forearm, the taped sections buckle and fold over themselves. They create empty air pockets where the paper lifts away from the arm. The purple ink never touches the skin in those spots. When you pull the paper away, you find a huge blank gap in the middle of your seamless tattoo stencil, forcing you to redraw the missing lines with a sharpie marker for another twenty minutes.
Moving to a Better Printing Method
Breaking away from the endless cycle of cutting and sticking small pages together requires a fundamental change in your hardware. Modern equipment finally allows artists to output massive, uninterrupted digital drawings directly onto physical paper, completely eliminating the need for scissors in your daily setup.
Embracing Unbroken Paper Formats
The secret to wrapping an arm flawlessly is abandoning the idea of separate pages completely. You need a continuous tattoo stencil. Instead of buying boxes of pre-cut A4 sheets, busy artists are shifting their focus entirely to roll tattoo transfer paper. Think of it like a giant roll of paper towels. The paper literally never ends until you decide to cut it yourself. If your digital design on your tablet is 24 inches long, the machine just keeps feeding paper until the entire 24-inch design is completely finished. There are absolutely no page breaks, no white margins eating your intricate lines, and zero need for sticky tape. The paper stays highly flexible because there is no tape making it stiff.
The Right Hardware for the Job
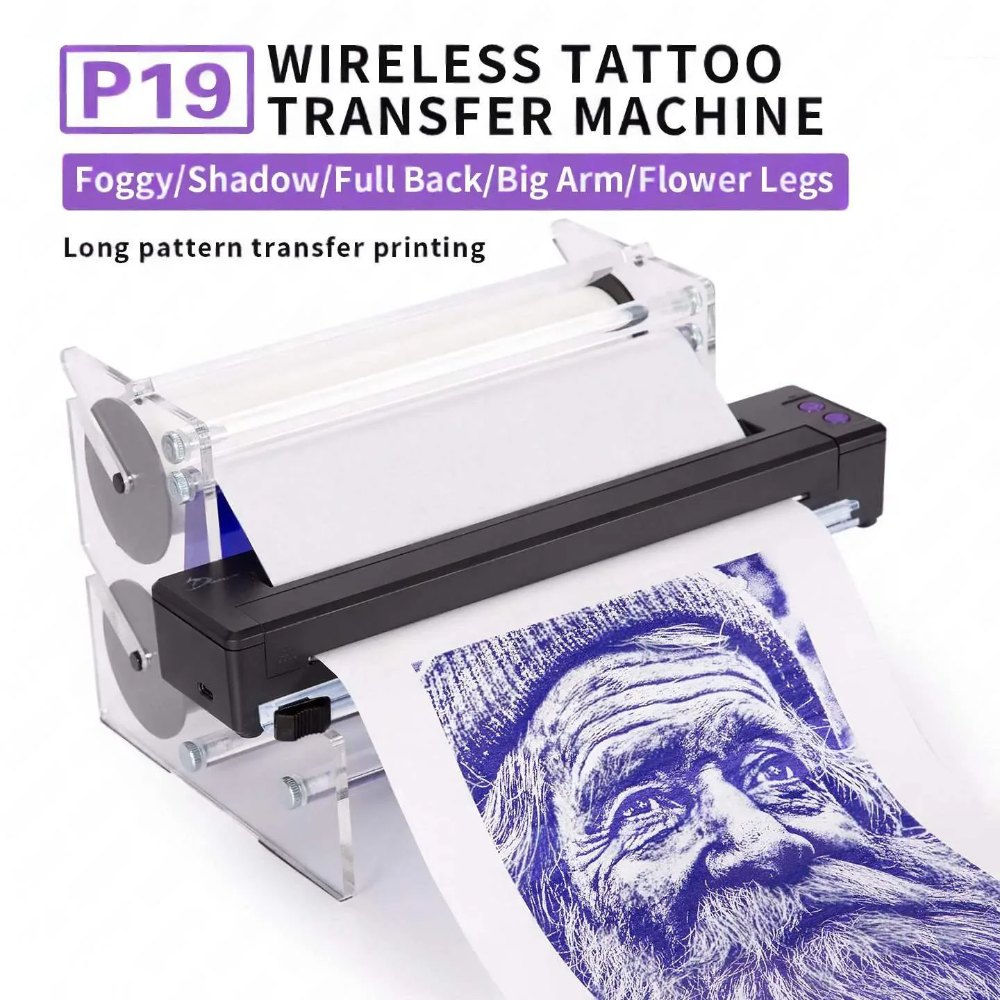
You obviously cannot feed a giant 30-meter roll into an old, traditional desktop machine with a tiny paper slot. You need a tattoo stencil printer specifically built to handle rolling materials smoothly. For example, the P19 Printer 30m Roll Transfer Paper Set from Yaba completely changes the daily workflow in a busy shop. You just connect your iPad or phone directly to the printer via Bluetooth. The machine pulls from the massive roll of high-quality paper and spits out your design in one perfect, unbroken line. It uses thermal heating, so you never have to buy liquid ink cartridges. It is small enough to throw in a backpack if you travel to conventions, but strong enough to output a massive piece of art that covers an entire leg in just thirty seconds.
Step-by-Step Guide for Perfect Placement
Having a massive, unbroken sheet of purple transfer paper in your hands easily solves the printing problem. However, applying it perfectly straight onto a cylindrical human shape like an arm or a leg requires a totally different physical approach than placing a flat chest piece.
- Prepare the skin heavily: Hair physically stops the paper from laying flat against the pores. Shave the entire arm completely, even the light blonde peach fuzz you can barely see. Wash the arm twice with 70% rubbing alcohol to strip away all natural body oils and sweat.
- Use the right liquid slip: Apply a professional gel. You need the surface slightly wet so you can slide the long paper a tiny bit if you miss the center mark, but tacky enough to grab the heavy purple dye. Do not use cheap green soap for massive arms.
- The top anchor method: Never try to stick the whole long sheet on at once. Have the client stand completely relaxed. Stick the very top edge of the paper to the top of their shoulder first. Hold that top piece firmly in place with your left hand.
- Roll it down the limb: With your right hand, slowly roll the rest of the paper down the arm toward the wrist. As it rolls down, use your thumbs to push outward from the center spine of the paper. This pushes all the trapped air bubbles out to the sides.
- Make smart relief cuts: Even with flexible roll tattoo transfer paper, an arm tapers heavily at the wrist. Use clean scissors to cut small, one-inch slits along the blank outer edges of the paper. This allows the paper to fan out and fold naturally over the narrowing wrist without wrinkling your main design in the center.
Financial Benefits of Ditching A4 Sheets
Beyond the obvious improvements to your daily workflow and client comfort, changing how you source your daily paper supplies has a direct, measurable impact on your studio’s monthly bank account. It is time to look closely at the math behind your printing habits.
- No more wasted cut-offs: When you print a tiny 3-inch star or a small name on a standard A4 sheet, you usually end up throwing the remaining blank half of that expensive paper directly into the trash. With a continuous roll system, you just press print and cut exactly the 3 inches you need. There is absolutely zero waste. Over a year, this saves hundreds of dollars.
- Less ruined paper from jamming: Traditional machines jam frequently because they struggle to pull single, slippery sheets perfectly straight through the rollers. A roll feeds from a fixed, stable spindle. It maintains perfect, even tension across the entire width of the print head, drastically reducing frustrating paper jams and ruined transfers.
- Saving billable time: Using the Yaba P19 Printer set lets you print long tattoo stencil projects instantly. You get back that 45 minutes you used to spend holding pages up to the light and taping them. That is 45 more minutes you can spend actually running your machine, putting ink in the skin, and making money.
Conclusion
Wrapping a massive piece of art around an entire human limb is challenging enough without fighting your own basic studio supplies. The days of struggling with scissors, scotch tape, and misaligned grids are completely over for professional artists. By upgrading your station to a dedicated roll printer, you instantly eliminate the stress of creating a full sleeve tattoo stencil. You get clean, unbroken purple lines that lay perfectly flat against the natural curves of the skin, giving you a highly accurate map for your needle. Your clients spend less time shivering in a cold chair while you wipe off and re-apply warped paper. If you are ready to modernize your daily workflow and stop wasting money on ruined A4 sheets, contact Yaba to get your continuous printing setup today.
FAQs
Q: Can I use a regular tattoo stencil printer for sleeves?
A: Yes, but you must manually cut and tape multiple pages together. A roll printer makes a seamless tattoo stencil instantly.
Q: How do you easily print long tattoo stencil designs?
A: Connect your tablet to a machine using roll tattoo transfer paper. It prints continuously without any frustrating page breaks.
Q: What is the best way to get a large tattoo stencil on an arm?
A: Anchor the top of a continuous tattoo stencil to the shoulder, then slowly roll it downward to prevent air bubbles.